
Today is based on one of the most popular card templates around at the moment.
I wasn't sure about the Card in a Box when I first saw it on Pinterest last year, but as with most things, it is making the right stamp set and/or decorative paper choices for you. Each and every one of us would make a card in a box and come up with something different.
My upline, Donna Keene, demonstrated this particular template at a recent Team Meeting, so thought I would give it a go. I played around with a few stamp sets and wasn't happy. BUT from the moment my Kinda Eclectic stamp set arrived in a recent order, I just knew it would work with my preference for vintage'y style.
You will need a scoring board/tool or a Stampin Trimmer (as it has not just a cutting blade, but also a scoring blade).

The basic template requires a piece of A4 Kraft cardstock trimmed to 21cms x 14.8cms (this allows the card to fit in a C6 envelope).
Get out your Simply Scored Tool and with the ling side at the top of the metric scoring board, Score at 5, 10, 15 & 20cms
Turn the cardstock so the short side is at the top of the scoring board, and score at 9cms.
Fold and burnish all scoring lines (fold away from the indented line to prevent fracturing of the cardstock as you fold/burnish)
With the 1cm fold to the right, cut with a pair of scissors down to the horizontal line on all 4 score lines. Now cut the 1cm flap on the right on the horizontal score line to the first vertical score line .
This will leave you with a 1cm flap to stick to the opposite end of the cardstock to make your 'box'.
(Do not fret, there really isn't a bottom to the box, just sides and flaps that come down)

Before adhereing the box together, you need to randomly stamp the outside of the cardstock with the following:
Starburst Stamp - use Hello Honey ink pad
Leaf Stamp - with Mossy Meadow ink pad
Berry Stamp - with Blackberry Bliss ink pad.
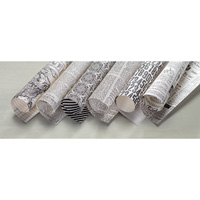
Now to overstamp some Typeset Designer Series Paper (DSP) with the same stamps and ink as above.
Trim the DSP to three pieces measuring 4.5cms (w) x 5.5cms (H)
and one piece measuring 4.5cms (w) x 14.5cms (H)
Ink the DSP edges with Blackberry Bliss ink, and adhere the three smaller pieces of DSP to three of the card flaps using Tombow Multipurpose Glue.
The longer piece of DSP needs to be adhered to the full length of the lower box section, and the flap above.
Now cut a piece of Blackberry Bliss cardstock to 14,5cms x 4.5cms & a piece of Kraft cardstock to 14cms x 4cms. Layer onto the Blackberry Bliss, and then onto the outside of the longer vertical panel. This panel can be used to write your greeting.
Use Sticky Strip to the tab and adhere to the opposite edge of the box to create your box.

Now for the Z Fold pieces that help to hold everything in place, and gives the 'pop up' mechanism that brings the box to life when it is removed from the envelope.
Trim 2 pieces of thin dowel or skewers to 14.8cms.
Trim two pieces of Kraft cardstock to 1cm x x 7cms, and score each end of the two stips at 1cm, fold and burnish the score lines.These need to be adhered inside the box left to right, just below the the height of the box. I found Glue Dots to be best for this bit,keeping the longer panel at the back of the box.
Adhere the cropped dowling/skewers to the back of the furthest Z fold strip (glue dots worked well).
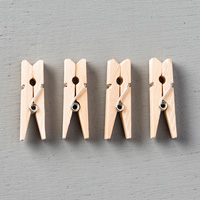
Tie a piece of Linen Thread to each Skewer and apply a couple of mini wooden pegs.
Stamp your sentiment onto Black cardstock with White Stazon ink. Die cut using the Decorative Label Punch.
Punch out two extra labels in Blacberry Bliss cardstock. Cut the first along the horizontal, and cut the second on the vertical . These 4 pieces of Blackberry Bliss cardstock can then be glued to the reverse of your sentiment label to make a layered frame.. Adhere to the front Z fold.

The final steps
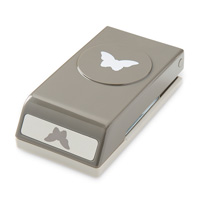
Stamps a few butterflies, using the stamps in the Kinda Eclectic Stamp Set using Blackberry Bliss and Mossy Meadow ink, 0n Kraft cardstock. Die cut with the Elegant Butterfly and the Bitty Butterfly punches. Embellish with some Basic Pearls and stock to the Linen Thread banner by sandwiching two butterflies together using Tombow Multipurpose Glue.
Cut the sewn edges of a length of Burlap Ribbon and adhere to the top of the card flaps using Sticky Strip. Repeat using some Venetian Crochet trim.
And you are done!
The instructions look more complicated than they actually are. If in doubt, give me a shout.
I hope to get to grips with videoing my blog posts and put them up on YOUTube ... but I am waiting for my hubbies help with that ha ha
Contact us today to talk about how we can help your Party, Wedding, Birthday or other event go with a bang with handmade invites, favours, Thank You cards and more by:
http://www,stamnpinupatthewarren.stampinup.net
Kim xxx
Email: stampinupatthewarren@hotmail.co.ukTelephone: 08432896848
Text: 07759587004
Happy Stamping Folks
OR ORDER ONLINE 24/7
OR ORDER ONLINE 24/7
 |  |  |  |  |
 |  |  |  |  |
 |  |  |  |  |
 |  |  |  |  |
 |  |
Table built using Product Table Builder by The Crafty Owl - Independent Stampin' Up! Demonstrator.


No comments:
Post a Comment