Yes ... it is the end of our first week of the Stamp Set Showcase
BY THE TIDE
And today is an extended flip flop card using Stampin Up's Label Card Thinlets Die.
It gives the appearance of one of those backing posters for home aquariums. Although it wasn't my intent, but I guess it is where my inspiration came from.
For this card you want to trim 2 pieces of Naturals White cardstock to 13.8 x 29.5cms. You will need your Big Shot Die Cutting Machine (or equivalent), but do not lay the die on top of the cardstock, instead you need to feed the cardstock through the die. So have your die with the cutting blades facing down. Feed the first piece of cardstock through from the top, and bring it out again immediately prior to cutting blade at the opposite end of the die. Centre the cardstock in the die and run through the Big Shot. This is much easier if you have the Magnetic Platform. If not, have your multi platform on tab 1. Repeat the above with the second piece of cardstock
You should be left with 2 pieces of cardstock that have a label cut out and two crease marks where the cardstock was behind the cutting blades.
Make valley & mountain folds on each crease and burnish with your bone folder.
sponge the edges of both pieces of cardstock. Put one aside as this is the card blank.
With the other piece of cardstock, you now need to use the Hardwood Stamp and Coastal Cabana ink to stamp the cardstock all over one side to give the appearance of a boat.
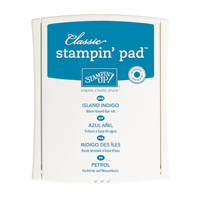
Now take the Seaweed stamp and randomly stamp the cardstock in Island Indigo cardstock, Repeat, but this time with Soft Suede ink. Finally take the Early Espresso ink pad, and the fish, seahorse and shell stamps, and randomly over stamp the cardstock.
On a scrap piece of Naturals White cardstock, stamp a fish and the anchor stamp in Early Espresso.
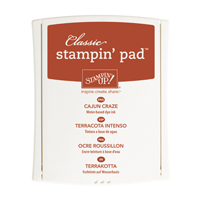
Then on another scrap of cardstock, stamp the Lobster in Cajun Craze cardstock. Apply Crystal Effects to each of the above and put to one side to dry.
Now you need to trim the panoramic stamped cardstock carefully along each score line. You will need to trim a few millimetres from the outside edges of the larger pieces of cardstock to allow you to snugly adhere all corresponding pieces of stamped cardstock neatly onto the card blank you put to one side at the beginning. I found Tombow Multipurpose Glue the best thing for this as you have a few seconds where you can move the cardstock before it sets.
Once dry, cut out your fish, lobster and anchor that had the Crystal Effects treatment and adhere to the card using Stampin Dimensionals.
Stamp your sentiment .... I used the Thank You stamp from the Something to Say stamp set which fit neatly into the banner die that comes with the Labels Card Die pack),
Attach some sound Linen Thread next to the Anchor using Glue Dots.
And that is it .... so much easier than making it in the usual long hand method.
See you with the New Stamp Set Showcase tomorrow
Happy Stamping
Kim xxx
Table built using Product Table Builder by The Crafty Owl - Independent Stampin' Up! Demonstrator.
Contact us for information on our Bespoke Handmade Cards, Favours, Gift Boxes and Invites
Telephone: 08432896848
Text: 07759587004
OR ORDER ONLINE 24/7


No comments:
Post a Comment