
Day Two of this weeks showcase using the Subtles Collection Designer Series Paper Spotlight
Today I have added in some stamping straight on top of the DSP along with changing the Wisteriea Wonder, to Perfect Plum.
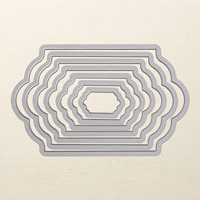
The circle Aperture adds additional interest, and the new nestie dies, Lots of Labels Framelits, create an interesting label.
I have added the 'HOW TO' further down this blogpost
I hope it gives you a little inspiration for your own Card Making or Scrapbooking
As sometimes, knowing what to do with Decorative Papers can be challenging.
I know it is for me, as I am a rubber stamping fanatic, and rarely use some papers, so I have to set aside time to play with papers
And this week is it!

And here are the products used in todays card
Just click the product links below for more information
 |  |  |  |  |
 |  |  |  |  |
 |  |  |  |  |
 |  |  |  |  |
 |  |  |  |  |
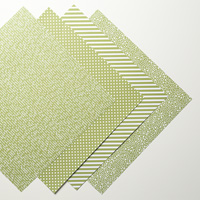 |  |  |
Table built using Product Table Builder by The Crafty Owl - Independent Stampin' Up! Demonstrator.

And here is how you could CASE today's card
Begin by making your 6" square card base using Stampin Up's Thicker A4 Whisper White Cardstock
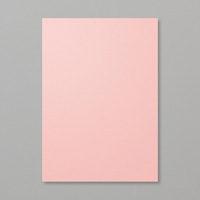
Next trim a piece of Blushing Bride Cardstock to 14.4 cms x 14.4 cms and attach to the card front using Fast Fuse Adhesive or Tombow since they do not warp the cardstock
Next trim a piece of Whisper White Carstock to 14 cms x 14 cms, and adhere this to the card base on top of the Blushing Bride Cardstock
And next is the final layer. Trim a piece of Blushing Bride Designer Series Pper to 13.6 cms x 13.6 cms
Using a Circle Framelit Die or a large Circle Pnch, to create an aperture.
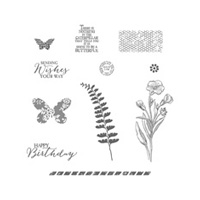
Now for the stamping
Time to get out your Butterfly Basics Stamp Set and your Perfect Plum Classic Ink Pad
Begin by stamping the Flower Stamp a couple of times onto the DSP.
Using Stampin Dimensionals, adhere the DSP to the card front.
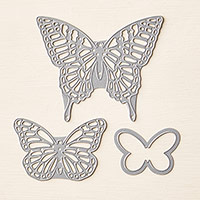
Then on some Scrap Whisper White Cardstock, stamp a couple of the butterflies, again using Perfect Plum Classic Ink Pad, then die cut these using the Butterfly Framelits (I forgot to add this Die Pack on the list of products... sorry)
Add one the the front of the DSP using a Stampin Dimensional, and the other inside the aperture using a Glue Dot.Add a large Basic Pearl to the centre of the flowers and a few tiny ones scattered onto the front of the DSP.
Finally, is the sentiment. Stamp the' Sending wishes your way'. stamp into a scrap of Whisper White Cardstock using Perfect Plum Ink Pad.
Die cut the label using one of the Lots of Labels Framelits Die (just select the best fit for your sentiment.
And that is it for today's card .... now it is your turn

Join my Pinterest
community board,
where you
can share your own Stampin Up Creations?
Follow the
Pinterest Board on the left hand side bar and I will send you an invitation to
follow the Stampin Up! At The Warren Community Pinterest Board
If you have any
questions on techniques or products, or Joining my Team/discussing the business
opportunities Stampin Up! Can offer
Contact Me
Or telephone/text
07759587004
Happy Stamping
Kim xxx
Order your Craft
Supplies on line 24/7
http://www.stampinup.net/esuite/home/stampinupatthewarren/
No comments:
Post a Comment