google-site-verification: google70410e9e92d4fda2.html

Saturday, 5 July 2014

Handmade Wedding Favours Stampin Up Style


My son and (now) Daughter In Law wanted to very much have a homemade wedding. And so, as a family we set to to ensure they had their wish come true, with homemade invites, decorations, bouquet and bridesmade posies. Even the button holes were handmade paper roses and, of course, there were the favours.

Can you see the sneek peek from yesterday? yes??


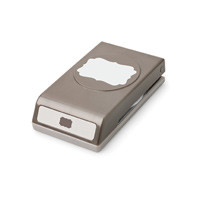
The theme used throughout was from one stamp set, and it is top of my list of Must Haves because it is just so versatile. If you add the Stamp-a-majog tool to the mix, you have even more stamping options available to you.

And the stamp set it ...

FOUR FRAMES

Perfect for labels, tags, greetings cards, scrapbooking and more. I particularly like using it in conjunction with the Creatively Yours stamp set.


But these favours were simple, with hand stamped and punched frames and hand written messages for each recipient, made using simple clear Cellophane wrapping and some red curling ribbon,  these favours were one of a kind. I hope you like them too?


Table built using Product Table Builder by The Crafty Owl - Independent Stampin' Up! Demonstrator.
To enquire on ordering, joining Team Warren, or our Bespoke Handmade Card & Gift Box service, please contact us:

Phone: 08432896848
Text: 07759587004


Friday, 4 July 2014

Wedding Blooms Meets Blendabilities

After a day of making a beanbag, curtains and cushions, then hoovering up all the waywood mini p[olyester balls. That was followed by feeding the five thousand (all our rabbits, guinea pigs, pygmy goats and dogs) I sat down about an hour ago to type up my latest blog, and POOF ... we had a power cut! The joys of rural living, but I wouldn't change it for the world. So I love my home and I love my life, I love my hubby and I love my animals ... including our honey bees.

Today's card is one of the many I made for our Sons recent wedding. All the cards were made in the wedding theme of Red and White. Real Red to be specific. It all began when my son turned up with a red tie and said, this is the colour red we are going for. 'Huh' says me 'that looks like Real Red to me' and blow me down if it wasn't an exact match! In the end, they went with a combo of Rose, Red Real Red and Cherry Cobbler. This card was the one left over after everyone else had picked the cards of their choice. The Textured Impressions Embossing Folder has now been retired (Vintage Wallpaper) but do watch out for the Weekly Deals and the Clearance Rack as you never know when it may pop up there. 

The item I am most excited about, is Blendabilities. Stampin Up now has it's own Alcohol Colouring pens, With a fine tip and a brush tip, they are perfect for all your crafty colouring solutions. Use with the colour lifter to decide how intense you want the colours to be. The uniqueness of Blendabilities, is that each pack of 3 pens come in 3 shades of the same 'colour' to help with the seamless colour blending. Try then out for yourself. At £10.95 for each pack of 3 pens, they are also competitively priced. You will need a Memento Ink Pad otherwise you will get bleed out of colour (Stazon is also Alcohol based).


I know I have shared this photo of my new Daughter-In-Law and her bridesmaids before, but we are still waiting on the DVD of the official photo's ... and sure you won't mind anyway.

All of the bouquets, hair bands, posies etc were handmade, as were the favours. I might have almost cleared out Stampin Up of Whisper White and Real Red cardstock he he.

The centre of the card is a left over from last years Autumn/Winter Seasonal Catalogue, but it worked really well, and gave that little piece of sparkle, which is a must for all wedding cards. I also used up some of my left over Artisan Accessory pack (the roses and the doily). And the sentiment stamp is from the Label Love stamp set, which is a roll over from last years catalogue (I am SO pleased about that). 


And below is a sneek peek of tomorrows blog ... but you will have to come back tomorrow to see it in it's full glory,


Happy Stamping
Kim Tolton xx

Table built using Product Table Builder by The Crafty Owl - Independent Stampin' Up! Demonstrator.

If you would like to chat about any stampin up products, ordering, or our bespoke handmade card service, please contact us via:

Telephone: 08432896848
Text: 07759587004


Thursday, 3 July 2014

Project Life by Stampin Up Everyday Adventure


Today, I am going to talk a little about Project Life and share one of the pages I made using Project life cards, journalling pens, washi tape and accessory pack.

Those you you that know me, you will be familiar with my love of scrapbooking, making pages from plain cardstock and lovingly making scrapbook pages using a wide range of techniques. An average page will take me an evening to make, plus time to think about what photo(s) I an going to use, and which colours I am going to pick out from the photo.

So when I learnt about project life, I was sceptical. But never one to baulk at change, I purchased the Everyday Adventure and Accessory Pack. I also purchased a pack of Journalling Pens, and a 12" variety Pack of Project Life Pocket Pages.

 
Well, I had to eat my hat. Once I got stuck in, I was able to put pages together quickly and my family loved the end result. I was able to make 7 .... yes, you heard me, SEVEN pages in one evening!

This particular page is of my Son Christopher. I loved the montage I made here of Chris at 5 years, and later as a young man in the Air Training Corps, plus a few more memories added in to boot. The double sided Journalling Cards & filler cards, makes it really quick and simple to do your journalling, create background, and with a bit of careful placements, you can be thrifty with the cards you use both sides of the card to make 2 co-ordinated pages.


But what surprised me the most, was how my pen hand began to flow ... and easily! I have never found it easy to use journalling on my scrapbook pages. Using sentiment stamps to tell my story. But with Project Life journalling cards, I found that I could easily write about the memories surrounding the photos I was using. What was even more fabulous, was how my journalling stimulated so much conversation when my family saw the pages.

The Project Life/Stampin Up exclusive photopolymer stamp sets makes scrapbooking more affordable, and reduces the amount of storage space you need. Even the box the cards come in, are robust enough to use as storage for your photopolymer stamps, journalling pens, and your handmade journalling cards.


I really feel that Project Life, with it's Stampin Up! exclusive stamp sets, will appeal to all levels of scrapbooker, Whether you are a busy Mum wanting to record your babies first year, newly married wanting to make a scrapbook of your wedding day, honeymoon, etc et. It will work by mixing up Project Life pages, alongside traditional scrapbook pages ... or your hobby ... or .... or .... or!!

At the end of the say, Scrapbooking is what you want it to be, and your family and friends will love  your creativity.


Table built using Product Table Builder by The Crafty Owl - Independent Stampin' Up! Demonstrator.


Happy Stamping
Kim Tolton

Now you can order your Stampin Up Supplies online 24/7

http://www.stampinupatthewarren.stampinup.net 


Wednesday, 2 July 2014

Something For Baby

Before I talk about todays project, I have to de-stress to you, my captive audience. Why? Well I had a nightmare of a day yesterday. My eldest son is currently living with us, having been on long term sick leave having had major surgery in November 13, Yesterday was meant to be a 2 hour round trip to the Royal National Orthopaedic Hospital, Stanmore for his latest MRI scan. Simple I hear you say ... hmmmm .... but if I were to say M25, would you go ahhhh!!! Yes it took us 7 hours .... that's right, 7 hours it took for us to get home. There was no-where to take a comfort break until 5 hours into the return journey, Only a month until our next round trip for the results of another test ... I am so not looking forward to that trip ha ha

So how did I chill out? First I had a big hug from my hubby, then I went to feed my guinea pigs and  pygmy goats. That on it's own helped to reduce the tension that was thrumming  through my body. But what REALLY helped my tension disappear was sitting with my new Stampin Up Catalogue and making my final decisions on what I was going to order first thing in the morning .... that was my ahhhh Bisto moment

And that swiftly brings me on to todays project. This time it is a 3D project. I make 3D projects all the time, but rarely blog about them. I promise to blog more of them in future.

This canvas was a bespoke order for a customer, and I had to wait until the pre-order started for us Demonstrators, before I could order the stamp Set I am using today ...

SOMETHING FOR BABY


The two little bunny's are not from the stamp set, but everything else is,

I began by stamping the baby-grow images in Lost Lagoon ink (one of the new Incolours), and Pool Party. These were die cut using the co-ordinating Framelits Dies (save 15% on ordering the bundle).

I then die cut the letters, and Stampin Up are now doing an Alpha Die Set similar to the one I used here, and applied the lettering to the baby-grows. These were then given a couple of coats of Pod Podge (Lustre high gloss).


Next I used Hello Honey ink to stamp the Ducks, and Lost Lagoon was again used, this time for the Pram. These were also die cut and then given the Mod Podge treatment.

Whilst waiting for these elements to dry, I created the background on the 8" canvas.
For the sky I punch an scallop oval shape from scrap cardstock and used this to mask areas as I used Lost Lagoon to sponge the clouds in the sky. Next I used the scallop border punch to die cut a strip of scalloped cardstock, which was used to mask the lower section of the  canvas to create waves for the ducks to swim on. I used a combination of Lost Lagoon, Pool Party and Soft sky inks to sponge the waves.

Finally, thepram, ducks and baby-grows were adhered to the canvas using Dimensionals. A piece of coastal cabana Thick Bakers Twine and attached this to the reverse side of the canvas using a Staple Gun, and used mini pegs to attach the baby-grows to the bakers twine.

The project was finished by die cutting the babies name  to the centre of the canvas.
I hope you like my 3D project and would love you share some of your projects with us by leaving comments below.

Table built using Product Table Builder by The Crafty Owl - Independent Stampin' Up! Demonstrator.

If you are interested in placing an order, or would like to enquire about out bespoke handmade card service, please contact us by:

Email: stampinupatthewarren@hotmail.co.uk
Telephone: 08432896848
Text: 07759587004

24/7 Online Ordering:

http://www.stampinupatthewarren.stampinup.net


Click the image of the catalogue below to go for a browse through the new catalogue


Tuesday, 1 July 2014

2014-15 Annual Stampin Up Catalogue Is Here

Yeha!!!

The much awaited day is here. The slaving away getting pre-order samples ready for the launch parties, on-line swaps and more is now going to be worth it all as we watch with bated breath, the reaction from our followers, customers, friends and family who have complained loudly at what they were losing from the catalogue, can now sit with a leisurely cup of coffee and browse the new catalogue, listing all the new must have goodies.

The new catalogue is more stream lined, with interactive CQ codes for those of us with smart phones so that at a click you can see all the products you need for the many projects demonstrated in the new catalogue.

There are plenty of creative ideas, as is expected from Stampin Up!, with more card kits for the novice and those where time is precious but you still want a hand made goodies for those you love.

Another newcomer to the catalogue is Stampin Up! Exclusive Project Life products ... I have had some fun playing with the cards and accessories, and as a seasoned, over complicating scrapbooker, I was surprised with how delighted I am with the products, and how sectioned pages slip in easily  alongside my traditionally made pages.

But best of all HAS to be the new Blendabilities. I have always loved hand colouring stamped images, and the new Stampin Up! pens leave me in no doubt, that I can now get all my colouring pens in one place. I love that you get 3 shades of each colour in the pack making blending and colouring easy.

Now I have withered on far too long, I will leave you to click on the image of the catalogue below, get that cup of coffee in from of your laptop, phone or PC and let out a big sigh as you browse the new look of Stampin Up!

P.S. Don't forget to place your orders too

Kim xx