
iI must apologise for my tardiness today!
Yes, I am rather late getting todays blog together
But I do have a good excuse! I have been having a lovely crafty natter with one of my Customers (and friend) Paula
And I hope that as crafty people yourselves, you will find it in yourselves to excuse me?
As for today's card, well ....
The card I am sharing with you , incorporates three of my Favorite Products in the current
Stampin Up Catalogue
& they are
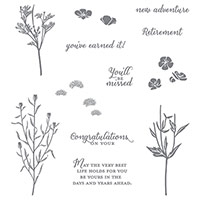
WILD ABOUT FLOWERS STAMP SET
ONE BIG MEANING STAMP SET
&
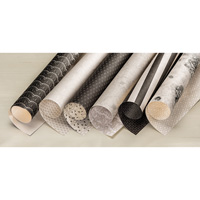
TIMELESS ELEGANCE DESIGNER SERIES PAPER

What do you think?
I hope you agree with me that these three products, with the addition of some Burlap Ribbon, just work together beautifully?
So here are the products used to make today's card
Simply click on the product icons to view them in more detail/ or order them
 |  |  |  |  |
 |  |  |  |  |
 |  |  |  |  |
Table built using Product Table Builder by The Crafty Owl - Independent Stampin' Up! Demonstrator.
And this is how I made it ...

I began by making an A6 Card Base using Crumb Cake Cardstock
Next I trimmed a piece of the Timeless Elegance DSP and adhered it to the lower half of the card front.
Now trim a piece of Very Vanilla Cardstock, wide enough to allow a small overlap of the DSP
You are now going to start stamping the Very Vanilla Panel
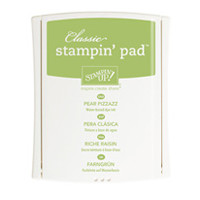
Begin by stamping your Flower Stems using Pear Pizzazz Classic Ink Pad
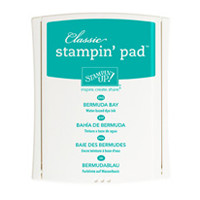
Then mount your flower heads onto an acrylic block and ink up the stamp with Bermuda Bay Classic Ink PAd. You will be able to see through the stamp and acrylic block to line up the flower heads with the stems, and stamp.
However, you can also randomly stamp extra flower heads over the stems and along the top of the cardstock to give an impression of the petals flying on the wind!
Next, Stamp your sentiment of choice from the Once Big Meaning Stamp Set, using the Early Espresso Classic Ink Pad.
Finally, Take a strip of Burlap Ribbon and cut it in half on the horizontal
Fray off the of the burlap and attach to the back of he stamped panel using Fast Fuse Adhesive
Mount the Stamped Panel so it overlaps the DSP panel slightly, using either Fast Fuse Adhesive or Stampin Dimensionals
And there is your card in super quick time too!
Let me know how you get on with your version of this card?
Happy Stamping
Kim xxx
Stamping Tip
Remember to condition your new stamps by inking them up and stamping them off onto scrap paper several times until the stamp is producing a crisp image.

Would like to JOIN my Pinterest Community Board?
Where you will be able to post your own
Stampin Up! Makes?
If the answer is YES follow
my Community Pinterest Board
(See the left side
bar of this block)
And I will sent you
an invitation to start pinning
If you have any
questions on techniques, orders, products
OR
Joining my Team as an Independent Stampin
Up! Demonstrator
contact me via:-
Email me: kim@stampinupatthewarren.com
Text: 07759587004
Order Online 24/7
No comments:
Post a Comment