
The card I am sharing with you today, I made a couple of weeks ago, I had photographed it, intending to share the card with you before now, but it got lost in my list of Draft Blog Posts haha
Last night whilst noseying around my blogger accent, I found it, and here it is,
These cards look complicated, but are in fact very simply. The key is accurate cutting and scoring
The rest is just a matter of trimming your designer series paper to size and adhering it to the card base.
The joy of these cards is that the card has a different appearance depending on which side you want at your card front.
In this card, I chose the middle square as my card front, and the triangle fold is decorated behind it.
I wen with this because most cards when standing on a shelf, are showing one side as well as the front (since most cards are displayed at an angle)
To give the card more structure, I chose the new A4 Thicker Whisper White Cardstock to create the card base, as it has more stability.
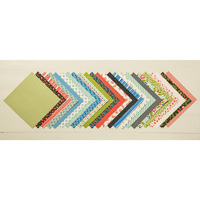
But the card itself features Very Vanilla cardstock to mimic the base colours in the Pretty Petals DSP stack that I have used to decorate the card.
I found the best results are used when trimming the cardstock for the precise cutting, and either the Metric Scoring Blade (with the Scoring Tool & Stylus) OR you Stampin Trimmer (scoring blade) for the scoring.

Here are the products I have used in making today's card
Just click on the product icons for more information
 |  |  |  |  |
 |  |  |  |  |
 |  |  |  |  |
 |  |
Table built using Product Table Builder by The Crafty Owl - Independent Stampin' Up! Demonstrator.

And here is how to Create the card.
Trim your cardstock to 10 cms x 30 cms
Score the long side at 10 cms & 20 cms
This is the trickiest bit
Have the first square facing you and score from the bottom right hand corner, to the top left hand corner
Rotate the cardstock by 180 degrees & again, score from the bottom right hand corner to the top left hand corner of that square
You should be left with 3 squares with the right and left hand squares having a diagonal score line across them
Take your bone folder and fold each score line creating a crisp edge with your bone folder.
Play with the way you fold up your card so you decide which is the front of the card.
Next, trim your pieces of Designer Series Paper to size and adhere to your card base using Fast Fuse Adhesive. I used the Pretty Petals 6" square DSP Stack and used different papers for each of the sides.
Next, I adhered a Tea Lace Doily to the "Front" of my card.
Then I stamped my Friendly Wishes Sentiment onto a scrap of Very Vanilla Cardstock using Early Espresso Classic Ink Pad.
Now comes a little colouring.
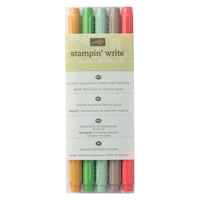
Using the 2015-2016 Stampin Write Markers, I took the Mint Macaron Marker and Shadowed the Stamped lines using the marker to create a little more interest on the front of the card.
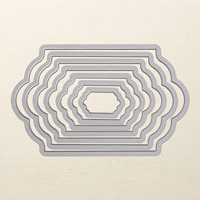
The sentiment was then Die Cut using the best sized Lots of Labels Framelit.
I attached Stampin Dimensionals to the back of the sentiment, and mounted it onto the Tea Lace Doily
And that my friends is my card for today.
I hope you like it, and have a go for yourselves.
Don't forget, if you follow my Pinterest Community Board, you will be invited to start pinning your own card craft projects onto the Board!

Why not JOIN my
Pinterest Community Board?
Where you will
be able to post your own Stampin Up! Makes?
To Join, simply
follow my Community Pinterest Board
(see the left
hand side bar on this blog)
And I will sent you
an invitation to start pinning
If you have any
questions on techniques, orders, products,
OR
Joining my Team
as an Independent Stampin Up! Demonstrator
contact me via:-
Email me: kim@stampinupatthewarren.com
Text: 07759587004
Order Online 24/7
No comments:
Post a Comment