
The last day of this weeks Stamp Set Showcase
HOLIDAY HOME
and today is all about box making using Stampin Up's all new Gift Box Punch Board
This is a great tool to help you make your handmade gift boxes quickly and simply, using up to a 12" x 12" piece of cardstock.
The possibilities are endless, as you could make boxes from Vellum, Gold or Silver Foiled Cardstock
Heat Emboss them, Dry Emboss them, Rubber Stamp Them etc
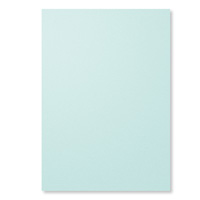
I have made a simple box having rubber stamped the Soft Sky cardstock with the teeny star stamp in the Holiday Home Stamp Set using Silver Encore ink.

Begin by trimming your cardstock to 6" x 6"
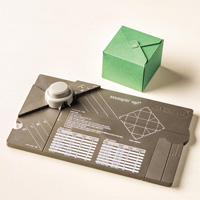
Then get out your GBPB Gift (box punch board) - you know, the one you have put on your early Christmas Present list to yourself he he

And above you can see the GBPB and even better is that the board has not just the punch that creates the corners, but also has a second punch on the back of the board (i.e. immediately behind the punch you can see above). You use the same button to punch down on, but this creates the little interlinking hooks that allows the box to be self sealing.
On the right hand side of the GBPB you can extend to scoring plate by opening out the board (it is hinged similar to the system on the Stampin Up trimmers).
So now you are going to place your 6" x 6" piece of cardboard onto the GBPB ... it sits diagonally and slots in under the punch. There are 4 diagonal lines on the board on the left hand side by the notch that contains your scoring tool. Pop this out before placing your cardstock onto the board. You are going to line up your cardstock to the Small (S) line on the left.
Punch
Then holding the cardstock in place score from the punch and down on the vertical, then repeat the scoring along the horizontal line.
Contintue to hold your cardstock in place, and you now need to turn your attention to the diagonal lines at the top left of the board.
You are now going to score along the Small (S) line to create a diagonal score line, but only go as far as where the diagonal line meets the horizontal line.
Rotate the cardstock and repeat the above.
Repeat twice more until all sides have been punched and scored.
Flip the cardstock over and place the cardstock back on the GBPB on the Small (S) Score line on the bottom left of the board and just punch (no need to score anything), rotate and repeat on all sides.
Chose opposite tabs and punch them on the revers side of the punch to create your hooks for the box to close
Fold and burnish the long score lines using your scoring tool that comes with the GBPB.
Now this is where the magic happens. The short diagonal lines need to be gently pinched inwards as you fold the box up, and then use your fingers to firmly pinch the cardstock to create a crisp fold.
Repeat this on each corner, and you will see the box begin to take shape. Once the box is folded up, you can place your goodies inside and gently hook the two punched tabs together.
I know it sounds complicated, but it is actually very simple and quick to do.
The BPB comes with full instructions and diagrams to make it easy enough for a complete novice to make ... so have a go!

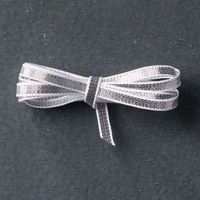
I finished the box by wrapping around a little Bermuda Bay 1/8" Taffeta Ribbon, tying a bow.
I then stamped one of the Houses from the Holiday Home stamp set and coloured it in using a combination of Cherry Cobbler and Coastal Cabana Blendabilities Alcohol pen assortments.
Die cut the house using the Holiday Home Framelits and mount onto a piece of Bermuda Bay cardstock.
Punch a hole at the top and thread through a little piece of Silver 1/8" ribbon & tie a knot.
And there you have it .... now go and enjoy playing and creating!

If you have
any questions on techniques, orders, products etc., please ask away by adding
comments below, or you can contact me via:-
Email: kim@stampinupatthewarren.com
Telephone/Text:07759587004
OR
Order Online
24/7 @ http://www.stampinupatthewarren.stampinup.net
Alternatively, you can click on the images of the products used today and it will take you straight to my online store
Kim xxx
Alternatively, you can click on the images of the products used today and it will take you straight to my online store
Kim xxx
 |  |  |  |  |
 |  |  |  |  |
 |  |  |  |  |
 |  |  |  |  |
 |
Table built using Product Table Builder by The Crafty Owl - Independent Stampin' Up! Demonstrator.


No comments:
Post a Comment