
DAY SIX
of this weeks
HOLIDAY HOME
STAMP SET SHOWCASE
And this is another wintry Christmas Card
With snowdrifts, warmly glowing streetlights, Trees and of course Santa's sledge passing over the house
This card builds on the masking technique used in yesterdays card, so you may want to read that too

Begin by making your card blank. Trim a piece of Whisper White cardstock to 15cms x 30cms (6" x 12")
Next you need to trim a further piece of cardstock to 12cns x 12cms) ... this is your main panel.
Using black Memento Ink, stamp the house and the street lamp (you want two of these) onto separate Post It Notes, ensuring there is a bit of the sticky strip on the back, as you need to cut around the stamped image, and the sticky strip on the back of the Post It Note will hold the mask in place whilst sponging and stamping.
Using some scrap cardstock, draw a few snow drift like curves, and cut them out. You can use both pieces you cut out.
However, I have used just one curve, and create a criss cross design as I spongd the snow drifts in place. I do this vy sponging with one side of the cardstock curve (positive), then flip it over and use the other side (negative)
To sponge fine lines as I have, you want a sponge dauber and smokey slate ink.
Place your 3 masks where you want the house and streetlights to be.
Place your curve on the dardstock and you are going to gently use small circular motions that begin on the cardstock curve and move onto the Whisper White panel.
Keep going until you feel you have a pleasing effect ... but do not over do it or the card will look too busy.
Next, get that piece of cardstock from yesterdays card that has the 1 3/4$ hole punched in it. Use this to sponge your moon with the residual ink on your sponge dauber.
Now you need to turn your attention to the trees. You want these to follow the drifts so it looks like they are in the snow. Begin with the leafless tree, stamping in Smokey Slate ink. Over stamp this with the Fir Tree and stamp these in Mossy Meadow ink.

Out comes your black Memento ink again, First, you want to stamp Santa's sledge so it is passing in front of the moon and over the house.
You can now remove your masks, and stamp the house and the street lamps.
Colour in your house using a combination of the Skin Tone Blendabilities Assortment, and the Cherry Cobbler assortment. Begin with the light shades, and create shadow and depth with the medium and darker tones in the Blendabilities assortments.Take your sponge dauber (use the one that has a little smokey slate residue left on it) and the So Saffron
126189 ink pad. Add a little warm glow by using the sponge dauber to add a little colour over the streetlights.
Stamp your Sentiment in the bottom left of the panel.
Use your Paper Piercing Tool to make a small hole where the door knob would be on the front door. Add a Silver Mini Brad.
Now for the matting (layering).
Mount the Stamped Panel onto a piece of Under The Tree Designer Series Paper (DSP) trimmed to 13cms x 13cms. Mount the stamped panel onto this layer. (I used tiny amounts of Tombow Multipurpose glue).
Turn over the piece of DSP left from trimming the above layer, and trim this reverse side to 14cms x 14cms & mount the above panels onto this one - as in the photo's/
add some Silver 1/8" ribbon, tied in a bow. Add an All Is Calm Snowflake Embellishment, attach to the card by the bow using a couple of Glue Dots. Add a Basic Rhinestone to the Center of the snowflake.
Mount the Topper onto the card blank using Stampin Dimensionals.
And all should be Calm ....

Happy Stamping xxx
If you have any questions on techniques, orders, products etc., please ask away by adding comments below, or you can contact me via:-
Email: kim@stampinupatthewarren.com
Telephone/Text:07759587004
OR
Order Online 24/7 @ http://www.stampinupatthewarren.stampinup.net
Alternatively, you can click on the product images below that I have used for today's card and it will take you straight to my store
Alternatively, you can click on the product images below that I have used for today's card and it will take you straight to my store
 |  |  |  |  |
 |  |  |  |  |
 |  |  |  |  |
 |  |  |  |  |
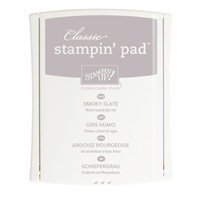 |  |  |
Table built using Product Table Builder by The Crafty Owl - Independent Stampin' Up! Demonstrator.


No comments:
Post a Comment