Hello and Good Morning to you all.
Today I have a card that is going to build on the techniques used for yesterdays card. So it you haven't already seen yesterdays card, please pop over there to read the sponging techniques used
But Don't Forget to pop back here for todays tutorial
FESTIVAL OF TREES
And of course there is a bit of glimmer, shimmer and sparkle
After all, it wouldn't be a Christmas Card without it, would it?
You will be pleased to know that you can reuse the card masks from yesterdays project
I do love a bit of recycling
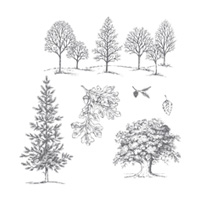
You are also going to need another tree Stamp Set .... yes, you guessed it ... LOVELY AS A TREE
If you don't already have it in your craft stash, you must ....totally and absolutlely MUST I know you want to ... don't you?
Begin by making your A6 card blank by trimming a piece of Whisper White cardstock to 14.8cms x 21cms. Score the long side at 10.5cms, fold and burnish the fold with your bone folder., put to one side to avoid contamination from inks
Trim a piece of Old Olive cardstock to 14.3 x 10cms. You will mount your stamped cardstock on onto this once you have finished sponging and stamping.
Trim your main panel of Whisper White cardstock to 13.8cms x 9.5cms
Now for the messy play ... keep baby wipes handy to de-ink your fingers if needed, but always wipe your hands dry on kitchen towel before handling other cardstock.
Take you panel of Whisper White cardstock, and Stamp yourself a forest at the top half of the of cardstock, using Smokey Slate ink.
Now take your snow drift masks from yesterday, and using Smokey Slate ink, start sponging in your snowdrifts, overlapping the tree stumps. As you come to the lower section of the card, leave larger areas of white to enhance the feeling of snow, Now ink up another sponge with Soft Sky ink and add some accents to the skyline.
Now you need to mount the Conifer Tree in the Festival of Trees stamp set, onto an acrylic block. Ink it up with Old Olive ink and ink some trees along the lower portion of the card, giving different heights and gaps between trees.
Now for the Lovely as a Tree Stamp Set
You will need to mount the Conifer tree onto an acrylic Block
Ink it up with Mossy Meadow ink
If you have a Stamp A Ma Jig tool, then get it out now, if you don't ... you could order one and make this once it arrives, or you can try lining up the stamps by eye ... if it doesn't work, the, you could order your Stamp A Ma Jog then and just turn the cardstock over and use it for you second attempt
But in fairness to your good selves, I find the photo-polymer stamps to be easy to line up because of their transparency ... so give it a go and see you you get on
You are now going to overstamp the conifers you stamped in Old Olive, but you want to offset the stamp by just 1 or 2 millimeters so you get a hint of the old olive ink coming through. This adds depth and dimension, and also a more natural look.
Mount this onto the Old Olive cardstock, and then mount that onto the card blank.
Now for the glimmer and glitter
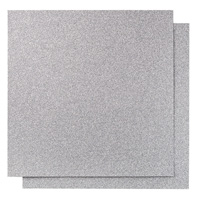
Trim a strip of Silver Glimmer Paper to 2cm x 14.5cms
Adhere this to the stamped panel, approximately 2 thirds of the way down the stamped panel, using Tombow multi-purpose glue.
Stamp your sentiment onto a scrap of Whisper White cardstock. Die cut using the Large Oval Punch. Apply Stampin Dimensionals to the reverse.
Die cut a label from Silver Glimmer cardstock using the Scallop Oval Punch, Apply Stampin Dimensionals to the reverse, Adhere the Sentiment on to of the Scallop Oval
Mount this onto the strip of Silver Glimmer Cardstock you mounted onto the stamped panel.
Add a few Basic Rhinestones to the top right of the card and you are done.
If you would like to join my community board on my Pinterest account to post your own photo's
ping me your email address and I will add you
If you would like
to ask any questions on techniques or products, or anything else related to my
blog posts, please feel free to ask away
Happy Stamping
Kim xxx
Contact me to
order:
Telephone/Txt:
07759587004
Email: kim@stampinupatthewarren.com
Or Order
Online 24/7
http://www.stampinupatthewarren.stampinup.net
Or Click on the
image of the products used below and it will take you straight to my online
store
Table built using Product Table Builder by The Crafty Owl - Independent Stampin' Up! Demonstrator.


No comments:
Post a Comment