
HOLIDAY HOME
DAY FOUR
Welcome to this weeks spooky halloween card
A fab silhouette with bats a a flying & Pumpkins a Popping!

Begin y making your 15cm / 6" square card blank by trimming a piece of Whisper White cardstock to 15cms x 30cms. Score the long side at 15cms.
Fold the card along the score line and burnish the fold with your bone folder to create a nice crisp fold. Put to one side to avoid contamination from inks.
Trim a piece of Basic Black cardstock to 14.5cms x 14.5cms
Trim a piece of Smokey Slate cardstock to 14cms x 14cms
trim a piece of Whisper White cardstock to 13.5cms x 13.5cms
Trim a strip of Basic Black cardstock to 13.5cms x 1cm

Take the square of whisper white cardstock and we are going to use this to create the background
Begin by die cutting the three houses in Basic Black cardstock using the Holiday Home framelits
Stamp the pumpkins from the Holiday Home stamp set along the bottom of the Whisper White panel using Pumpkin Pie ink
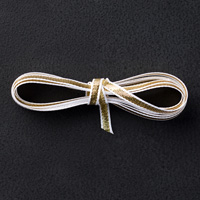
Wrap a piece of Crushed Curry 1/8" Taffetta ribbon (I used some left over Pumpkin Pie ribbon on my card, but this is now retired), you could also use Gold 1/8" ribbon. Both would look fab.
Use a little Fast Fuse adhesive on the back of the panel to secure the ribbon.
On top of this add the 1cm x 13.5cm strip of basic black cardstock
Now for the stamping and sponging.
Begin by laying out your Die Cuts on the card to work out where you want your lamppost to be.
Stamp the lamppost using Black Stazon ink
Using a scrap of cardstock, punch out a 1 1/4" circle
You are going to use this to sponge your moon.
Place the cardstock with the punched out circle where you want the moon to be, allowing space for your die cut houses.
Take a sponge dauber and with Smokey Slate ink pad, sponge inside the circle taking care not to move your mask whilst sponging.
Next, stamp away with the teeny bats ... and be as batty as you like
Apply Stampin Dimensionals to the reverse of the Die Cut houses and attach them to the panel.
Mount this panel onto the Smokey Slate panel, and then mount that onto the Basic Black panel that you trimmed to size earlier. I used a little Tombow Multi-Purpose Glue to do this.
Finally, adhere the topper onto your card blank
And your card is made with the exception of adding an insert to write your greeting on, and perhaps a few bats could be stamped onto the envelope too.
Now it is your turn to have a bit of fun ...

If you have any questions on techniques, orders, products etc., please ask away by adding comments below, or you can contact me via:-
Email: kim@stampinupatthewarren.com
Telephone/Text:07759587004
OR
Order Online 24/7 @ http://www.stampinupatthewarren.stampinup.net
Alternatively, you can click on the product images below and it will take you straight to my online store
 |  |  |  |  |
 |  |  |  |  |
 |  |  |  |  |
 |  |  |  |  |
 |
Table built using Product Table Builder by The Crafty Owl - Independent Stampin' Up! Demonstrator.


No comments:
Post a Comment