
Day 5 of
FESTIVAL OF TREES STAMP SET
And Today brings more sponging and stamping, but today is back tot he cool icy tones of Coastal
Cabana, Bermuda Bay and Pacific Points inks
Plus Slver Encore ink and the scrolled tree & Dove from the Same Stamp Set.
Lots of Glimmery, Shimmery, Silveriness
So here we go ...

Begin by making your A6 card blank by trimming a piece of Whisper White cardstock to 144.8cms x 21cm. Score the long side at 10.5cms, fold and burnish with your bone folder.
Put to one side to prevent contamination of your card blank with the inks.
Trim a piece of Silver Glimmer Paper to 14.3cms x 10cms. Put to one side also.
Trim another piece of Whisper White cardstock to 13.8cms x 9.5cms
This is the first piece you are going to be sponging and stamping

You will need the following ink pads and some pieces of Stampin Sponges (I usually cut mine into 6 segments).
Coastal Cabana
Bermuda Bay
Pacific Point
Begin with the Coastal Cabana ink, and randomly sponge areas if the cardstock. Repeat with the Bermuda Bay ink blending the two colours together in places, and then repeat again using the Pacific Bay ink. You will want to ink off the Pacific Point sponge as it is quite intense in colour. You can always add more ink, but you cannot take it away.
The lovely thing about the sponging techniques as each card will be unique.
Randomly stamp the sponged cardstock using the Scrolled tree and the dove using Silver Memento Ink.
Clean your hands with a baby wipe and wipe dry on kitchen towel.
Now trim a smaller piece of Whisper White cardstock to 9.5cms x 3cms.
This time sponge is as above but just with the Coastal Cabana and Bermuda Bay inks.
Randomly stamp this with Silver Encore ink using just the scrolled tree.
Mat (layer) this piece of sponged and stamped cardstock onto a piece of silver Glimmer Paper tmeasuring 9.5cms x 3.5cms using Stampin Dimensionals to pop the panel up.
Now mount this onto the larger panel of sponged & stamped cardstock using Stampin Dimensionals.
Nwxt mount the topper onto your card blank using a little Tombow Multipurpose Glue
Now for the finishing touches
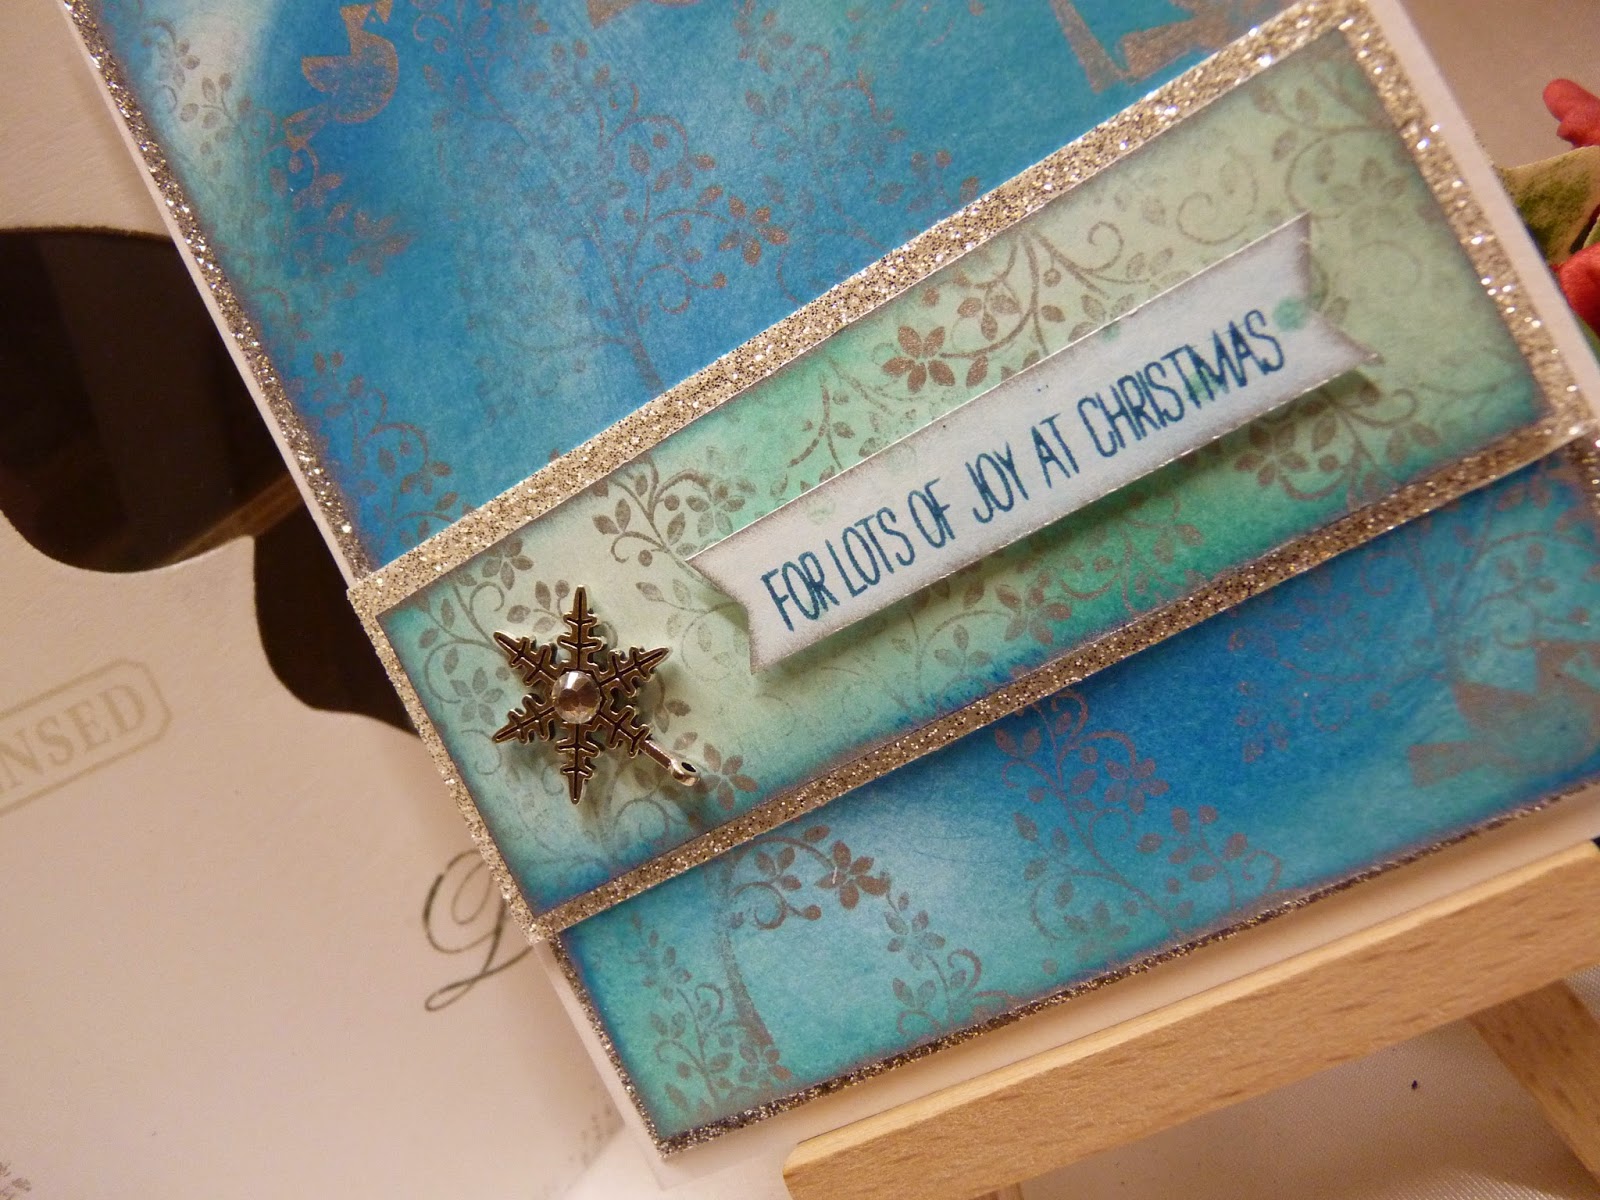
First, stamp your sentiment onto a scrap of Whisper White cardstock using Bermuda Bay ink.
Trim this down to 2cm in height and make banner ends by using the Banner punch. Now to do this, you need to feed the trimmed sentiment in through the top of the punch so you only punch the ends, remove, and repeat with the opposite end. Sponge the label lightly with the residual colour on your sponge. Add Stampin Dimensionals to the reverse and pop it up on the small panel.
And lastly adhere an ALL IS CALM snowflake embellishment to the smaller strip using a couple of Glue Dots. Add a basic rhinestone to the centre of the snowflake embellishment.
If you would like
to ask any questions on techniques or products, or anything else related to my
blog posts, please feel free to ask away
Before I go, if you are enjoying the Christmas Creations, then go take a peek at the Seasonal Supplement that is just out
But be quick about it as when they are gone they are gone!!
Just click the image of the star below and it will take you right there to have a peek

If you would like to join me by pinning your own creations on mu Community Page, just sent me your email address (see below) and I will add you on. Some Stampin Up Product to be included please
Happy Stamping
Kim xxx
Contact me to
order:
Telephone/Txt:
07759587004
Email: kim@stampinupatthewarren.com
Or Order
Online 24/7
Or Click on the
image of the products used below and it will take you straight to my online
store


No comments:
Post a Comment