
Worlds Greatest
Is the name of todays Guy Greetings meets Gorgeous Grunge Mash Up
And a great card for many of those men out there. The Spanner stamp is genius ... after all, do you know any man that doesn't own at least one spanner in his tool kit?
Supplies for today are:
Stamp Sets:
Guy Greetings Stamp Set
Gorgeous Grunge Stamp Set
Classic ink Pads:
Craft White
Crumb Cake
Cardstock:
Very Vanilla
Night of Navy
Soft Suede
Die/Punches:
File Tab (from the Christmas Cattalogue)
Banner Punch
Accessories:
Regals Designer Buttons
Adhesives:
Tombow Multi-purpose Glue
Glue Dots
Stampin Dimensionals
Tools:
Paper Snips
Stampin Sponges
Stampin Trimmer
Big Shot with Magnetic Platform

Begin by Trimming a piece each of Very Vanilla & Soft Suede Cardstock to 13.8 cms x .9.5 cms
Use the File Tab Die to create 2 overlapping tabs on the right side edge of both pieces of cardstock.
Take the Very Vanilla cardstock and randomly stamp the Spanner Stamp from Guy Greetings using Crumb Cake Cake ink making 1st, 5, 2nd & 3rd generations images
Sponge the edges of the Very Vanilla panel using Stampin Sponges and Crumb Cake ink.
Layer up the 3 pieces of cardstock as follows:
Very Vanilla on top
Soft Suede in the middle &
Mat these onto a piece of Night of Navy cardstock measuring 14.3 x 10 cms

Now trim a piece of Night of Navy cardstock to 12.8 x 7.5 cms, and use the File Die to create tabs at either end.
Stamp the cardstock with the fine splatter stamp from Gorgeous Grunge Stamp Set using White Craft Ink
Apply Stampin Dimensionals to the reverse side and mount onto the card front.
Stamp the Worlds Greatest Stamp (Guy Greetings) onto a scrap of Very Vanilla Cardstock and cut out using Paper Snips. Apply Stampin Dimensionals to the reverse and mount on the top half of the Night of Navy panel.
Stamp Your Sentiment onto Very Vanilla Cardstock using Night of Navy ink
Trim to 1.5cms wide and create banner ends using the Banner Punch by inserting the strip of cardstock in through the top of the punch, guiding it between the cutting blades. Turn and repeat with the opposite end.
Apply Stampin imensionals to the reverse and mount the the centre of the card front.
Finish with a small Designer Button,
And there you have it!

If you
would like to join my Pinterest community board where you will be able to post
your own Stampin Up creations. Simply email me and I will add you to the board
If you would like
to ask any questions on techniques or products, or anything else related to my
blog posts, please feel free to ask away
Happy Stamping
Kim xxx
Contact me to
order:
Telephone/Txt:
07759587004
Email: kim@stampinupatthewarren.com
Or Order
Online 24/7
Or Click on the
image of the products used below and it will take you straight to my online
store
 |  |  |  |  |
 |  |  |  |  |
 |  |  |  |  |
 |  |  | 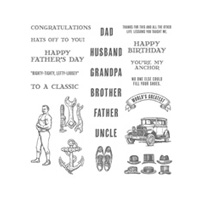 |
Table built using Product Table Builder by The Crafty Owl - Independent Stampin' Up! Demonstrator.


No comments:
Post a Comment