
SALE A BRATION ENDS TOMORROW
YOU HAVE UNTIL MIDNIGHT TOMORROW TO GET YOUR LAST ORDERS IN TO EARN FREE PRODUCTS WITH EVERY £45 YOU SPEND
Don't miss out on your freebies!!
Well guys ... the nerves are setting in. only a couple of days to go and I will be back under the knife for my spinal surgery .... eek
But I have been a busy beaver and have made, photographed and uploaded to blogger just over 20 cards ready to go, just have to type up the tutorials on a daily basis, so even if my recovery is frustratingly slightly longer than I am hoping (I am hoping for no more than a couple of weeks recovery), then at least you guys won't miss out on my daily projects.
It does mean that tomorrow and Tuesday I will need to schedule 2 posts each day to allow for the really grom 48 hours post-op where I know the last thing on my mind will be ... pass me my laptop in favour of "More Drugs, NOW .. please?"
Anyway, in keeping with my current wedding theme, todays card is a Postcard Wedding invitation

Begin by making your A6 Kraft Card, Card Blank
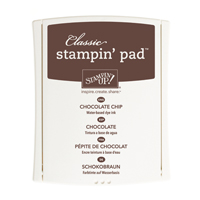
Next stamp the Postcard stamp onto a piece of Kraft cardstock using Chocolate Chip ink.
Trim the Postcard to size.
Next trim a piece of Subtles Designer Series Paper (I have used Marina Mist( to 10 cm x 14.3 cms and adhere to the front of your card blank.

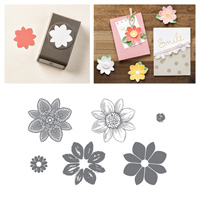
Now you need to create a background for the invitation, and today, that means a 3 step stamp. Many of you will have earnt the Lotus Blossom Stamp Set during Sale A Bration, and that is what I have used today. You will need the following inks:
Poo; Party
Marina Mist
Night of Navy
The lacetate for the stamp set is number 1 to 3, so you start with the least detailed stamp, working up to the most detailed stamp, You also go from the lightest colour to the darkest.
Now here is a handy tip Before you start stamping.
Each of the flower stamps has a little arrow built into one of the top corners of the stamp.
Use this to line up each stamp accurately ... but having said that, Stampin Up's 2 and 3 stage stamp sets are very forgiving, and you can create some of the nicest results when the stamps do not fully line up. I used the latter by intent to give a water colour effect on the card front.
You will find that the colours are more muted than usual because you are working on Kraft cardstock.
Once you have stamped your Lotus Blossom onto the Postcard, the next step is to stamp the SAVE THE DATE stamp using Chocolate Chip ink again.
Apply Stampin Dimensionals to the reverse of the Postcard and mount it onto your card front at an angle.
Now for the WOW ... Select a detailed Flower Stamp, I have chosen the Lacy flower from the Petal Potpourri Stamp Set, as it has a co-ordinating Medallion Flower Punch (available as a bundle with 15% saving on the market price).
Using Versamark ink pad , stamp the lacey Flower onto White Vellum and dust with White Embossing Powder and heat set with your Heat Tool,
Once cool, punch out the flower & apply a Stampin Dimensional to the reverse, and mount it onto your card front.
Finish by threading a Vintage Button with Linen Thread and tie a fairly large bow. Mount on top of the flower using a Glue Dot and you are all done ... perfect for a Handmade Wedding Invitation. Check out the other stamps in the stamp set as suitable for all things around a wedding
But most of all, have fun and keep stamping!

If you
would like to join my Pinterest community board where you will be able to post
your own Stampin Up creations. Simply email me and I will add you to the board
If you would like
to ask any questions on techniques or products, or anything else related to my
blog posts, please feel free to ask away
Happy Stamping
Kim xxx
Contact me to
order:
Telephone/Txt:
07759587004
Email: kim@stampinupatthewarren.com
Or Order
Online 24/7
Or Click on the
image of the products used below and it will take you straight to my online
store
 |  |  |  |  |
 |  |  |  |  |
 |  |  |  |  |
 |  |  |  |
Table built using Product Table Builder by The Crafty Owl - Independent Stampin' Up! Demonstrator.

No comments:
Post a Comment