There is something about the nights drawing in, and thinking of the forthcoming festive season, that just says Sponging, like no other season.
My hubby was sitting in my workshop with me as I was creating todays card, and I appreciated his help with some of the design as I was still feeling rather under the weather with this tummy bug that is going on for what seems like forever. And there is nothing worse than feeling bloated and nauseas to ebb the flow of creative juices.
& you will be delighted to know that the result is a very short list of products for today
Remember to scroll further down todays blogpost for the tutorial if you fancy having a go at today's card
And here are those products used to create today's card
Click on the product icons below to be taken to mu online store to order the items you don't already have,
Table built using Product Table Builder by The Crafty Owl - Independent Stampin' Up! Demonstrator.
- Begin by making your card base by trimming a piece of Thicker A4 Whisper White Cardstock to 21 cms x 14.8 cms. Score the long side at 10.5 cms, fold and create a nice crisp fold using your bone folder. Place to one side to avoid contamination by the inks
- Trim a piece of Whisper White Cardstock to 14 cms x 9.7 cms
- Begin by wiping the surface of the Whisper White Panel with your embossing buddy, to remove any static on the card, then randomly stamp the panel with the tiny stars from the Holly Jolly Christmas Stamp Set, using Versamark ink, dust with clear embossing powder, remove the excess, and heat set with your Heat Tool.
- Now for the sponging. Begin by cutting your Stampin Sponge into 7 pieces, and ink one up with Night of Navy ink using the NoN Classic Ink Pad. Start in small gentle circles, and build the colour by extending the circles and adding extra ink to deepen the colour. You want to cover about 2/3 of the panel with the blue, then take another wedge of Stampin Sponge with Mossy Meadow Ink and build the colour as before, but this time, blend the two colours together a little.
- now take a piece of Kitchen Towel and wipe over the embossing to remove any excess ink.
- We are almost done .... I know, short and sweet for me huh? Ink up the large snowflake stamp from the stamp set, with Night of Navy Classic Ink Pad. and randomly stamp a couple of snowflakes.
- Stamp the 'Wishing You' sentiment, and the "JOY" sentiment in Night of Navy ink onto scraps of Whisper White Cardstock. Sponge the sentiments with residual ink on your sponges.
- Punch the first sentiment out using the Word Window Punch, and the second with the extra large oval Punch. you also need to punch a Scallop Oval from Old Olive Cardstock. Apply Stampin Dimensionals to the reverse of each of the punched labels. layer up the oval onto the scallop oval, and then mount your labels on the cardfront as shown.
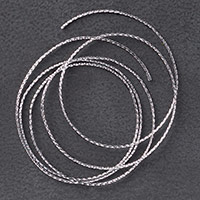
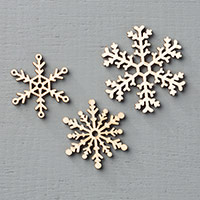
- Finish with some accessorization Firstly, add a Snowflake Element and a few Basic Rhinestones, and you are done for today.
Happy Stamping
Kim xxx
Join my Pinterest community board,
where you can share your own Stampin Up Creations?
Follow the Pinterest Board on the left hand side
bar and I will send you an invitation to follow the Stampin Up! At The Warren
Community Pinterest Board
If you have any
questions on techniques or products, or Joining my Team/discussing the business
opportunities Stampin Up! Can offer
Contact Me
Or telephone/text
07759587004
Happy Stamping
Kim
xxx
Order your Craft
Supplies on line 24/7
http://www.stampinup.net/esuite/home/stampinupatthewarren/


No comments:
Post a Comment