
today's card is one of my personal favourites that I have made
Sometimes it is nice to keep thinks clean, crisp and simple, and that is exactly what this one layer card offers
And I am assuming by now, that you all have access to, or own a Big Shot Die Cutting Machine, as that is the key to quick and simple but stylish cards that you can create in a snip, and in larger numbers too ... so if you are a new demonstrator, looking for your first swaps for a Stampin Up event, that is just the kind of thing you need to be looking for to make a statement,

And below are the products you'll need for today's card
Click on the product icons for more information
 |  |  |  |  |
 |  |  |  |  |
 |  |  |  |  |
 | 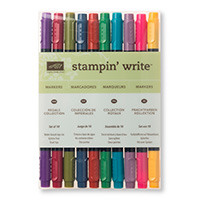 | 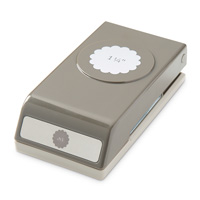 |
Table built using Product Table Builder by The Crafty Owl - Independent Stampin' Up! Demonstrator.

- Make your 5" square Card Base by trimming a piece of Thicker A4 Whisper White Cardstock to 12.5 cms x 25 cms. Score the long side at 12.5 cms
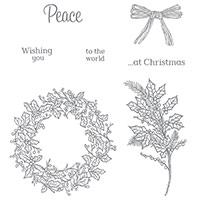
- Next, stamp the peaceful Wreath stamp onto a scrap of Whisper White Cardstock using the Basic Black Archival Ink Pad.
- Once the ink is dry you can begin using your Stampin Write Markers to colour in the wreath. I used Cherry Cobbler, Garden Green and Always Artichoke (all from the Regals Collection).
- Stamp out the bow using the ink of your choice (I chose Soft Suede)
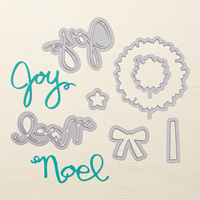
- Next die cut the wreath and bow
- Apply Stampin Dimensionals to the back of the Wreath and the bow. Mount the Bow in the wreath and the wreath to the centre of your Card Base
- Now for some heat embossing. Stamp the "Wishing You Peace" onto a scrap of Whisper White Cardstock using Versamark Ink and dust with Silver Embossing Powder, punch out using the 1 1/4" Scallop Circle, apply a couple of Stampin Dimensionals to the reverse of the label and adhere it to the centre of the wreath
- Finally stamp the "... st Christmas" stamp in the bottom right of the card front using Versamark, and heat emboss using Silver Embossing Powder again. Add a few Basic Rhinestones.
And that is your card completed ... now it is your turn to have fun

Join my Pinterest community board,
where you can share your own Stampin Up Creations?
Follow the Pinterest Board on the left hand side
bar and I will send you an invitation to follow the Stampin Up! At The Warren
Community Pinterest Board
If you have any
questions on techniques or products, or Joining my Team/discussing the business
opportunities Stampin Up! Can offer
Contact Me
Or telephone/text
07759587004
Happy Stamping
Kim
xxx
Order your Craft
Supplies on line 24/7
http://www.stampinup.net/esuite/home/stampinupatthewarren/
No comments:
Post a Comment