
I must apologise for today's post being a little later than normal. Unfortunately one of the recent visitors here at The Warren, an unknown person gave me a dose of gastro-enteritis!
So I have spent the last 24 hours getting up close and personal with my lavatory!! eeuu!!
I am now in that linbo place where I feel hungry but don't want to eat because my stomach feels so tender, and I don't want to kick things off again.
Anyhow, I still managed to get into my workshop for a short period of time to make todays card offering.
This card is made using another of Stampin Up!'s Bundle special offers, giving you a 15% saving on the purchase price, when you order the stamp set and coordinating punch,
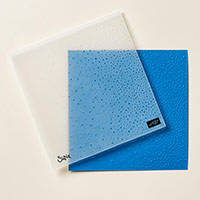
I have added the Gently Falling Textured Impressions Embossing Folder.
I have gone with a colour scheme of
Real Red
Cherry Cobbler
Mossy Meadow
& Whisper White

And here are the products you need to replicate this card.
Click on the product icons below to place your order, or browse the catalogue.


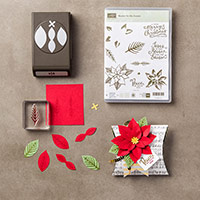

Scroll down further for the tutorial.

- begin by making your 6" square card base by trimming a piece of A4 Thicker Whisper White Cardstock 6" x 12". Score the long side at 6" using either the scoring blade on your Stampin Trimmer, or your Scoring Tool & Stylus. Fold and make a crisp fold by using your Bone Folder along that fold.
- Trim a piece of Whisper White Cardstock to 12 cm square.
- Trim a piece of Real Red Cardstock to 12 cms x 3cms, Stamp this panel using the small round stamp from Reason for the Season stamp set, and randomly stamp the Real Red Cardstock.
- Adhere here the real red panel to the bottom third of the 12 cm square panel, using Cherry Cobbler Classic Ink Pad.
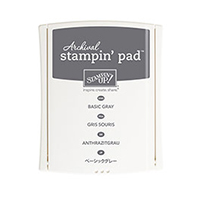
- Stamp the sentiment using Basic Grey Archival Ink Pad approximately 4 cms from the bottom of the panel. Adhere the Real Red panel to the bottom of the panel, using Fast Fuse Adhesive.
- Dry Emboss the Whisper White/Real Red panel using the Gently Falling Textured Impressions Embossing Folder (TIEF).
- Next take the sketed poinsettia flower and onto Whisper White Cardstock first using Cherry Cobbler Classic Ink Pad. Clean the rubber stamp Cl and re-ink with Mossy Meadow Classic Ink Pad, and stamp this flower onto Whisper White Cardstock also,
- Punch out both flowers using the coordinating punch, and add a couple of Stampin Dimensionals to the reverse side of each stamped and punched flower. Mount the Mossy Meadow Punched flower first so it overlaps the join between red and white cardstock. Coil some Silver Pipping Trim and adhere to the back of the stamped flower using a little Fast Fuse so the trim can be seen once you mount the red flower on top.
- Then mount the red flower on top overlapping the first one, so the breen flower become the leaves for the flower.
- Mat this panel on to a piece of Cherry Cobbler Cardstock measuring 12.4 x 12.4 cms, using Fast Fuse Adhesive. Mount this panel.
- Mount the card front onto the front of your Card Base.
- Add an iced Rhinestone Embellishment to the centre of the flower.
- And that is it ,,,, now it is your turn,

Join my Pinterest community board,
Where you can share your own Stampin Up Creations?
Follow the Pinterest Board on the left hand side
bar and I will send you an invitation to follow the Stampin Up! At The Warren
Community Pinterest Board
If you have any
questions on techniques or products, or Joining my Team/discussing the business
opportunities Stampin Up! Can offer
Contact Me
Or telephone/text
07759587004
Happy Stamping
Kim
xxx
Order your Craft
Supplies on line 24/7
http://www.stampinup.net/esuite/home/stampinupatthewarren/
No comments:
Post a Comment