Good Morning to you All
Can you believe that we are already half the way through the week again.
I have been so busy working on my top secret Fabric Project for a client that the days are just rolling by, just as The Autumn is rolling on in!
Apart from the persisting Mosquito's, I love this time of year. The leaves on some of the trees are already changing colour and dropping (which the Goats love eating). the days are less balmy, sleep comes easier, and my TV gets switched on a little earlier than usual to watch XFactor and this week has seen the start of this seasons Strictly Come Dancing.
We have begun sawing wood for the wood store to keep the wood burning stove going over the winter months ... don't even get me started on Christmas!!! As I LOVE IT!
But anyway, as usual I get a little distracted as I start typing. Or perhaps it is the Barrel Aged Apple Brandy I am sipping ... but I really must get back to todays card make.
If you have been following my daily Blog Posts, from earlier this week, you will know that I alluded to making a Blue & White themed Wedding Card.
And here it is ... it looks more complicated than it actually is ... I promise
You will need a cream/Ivory A6 card blank and envelope
Begin By Trimming a piece of Very Vanilla cardstock to 20cms x 13.8cms
Trim a piece of Night of Navy cardstock to 20.5cms x 14.3cms
Take your I Love Lace background stamp and using Night of Navy ink, ink off the stamp, and then stamp onto the Very Vanilla cardstock to leave a lighter shade of the ink. Once dry, mount this panel onto the Night of Navy cardstock you have just trimmed to size. I use tiny amounts of Tombow MP Glue to do this.
Trim another piece of Very Vanilla Cardstock to 18cms x 12.8cms
Trim another piece of Night of Navy cardstock to 19.5cms x 13.3cms
Take the Very Vanilla cardstock and Night of Navy in, and stamp the panel with the I Love Lace stamp. Once dry, trim this piece of cardstock into 3 equal pieces, leaving a few millimeters between each as you mounth them onto the Night of Navy cardstock you just trimmed to size.
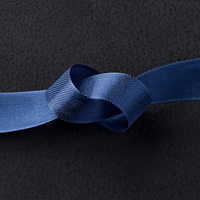
Wrap sone Night of Navy Seam Binding Ribbon around the panel and tie a bow, trim the tails.
Take the Amazing Birthday stamp set, and stamp the 'Make Today' ... stamp, and using Night of Navy ink * a scrap of Very Vanilla Cardstock, stamp the image and once dry, trim to size leaving just a 2mm border around all sides of the stamped image. Apply Stampin Dimensionals to the reverse side of the panel.
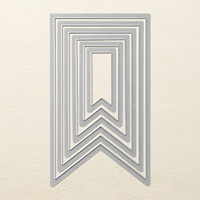
Stamp the 'Hello' stamp from Perfect Penants onto some scrap cardstock using Night of Navy ink. Die cut using the Banner Framelits Die Collection. Pierce a hole in the top left of the Sentiment and attach the HELLO vanner to the Sentiment panel using a Mini Silver Brad.Attach the Sentiment to the central panel on the Topper.
Finish by Stamping the Mr & Mrs stamp from Label Love stamp set onto a scrap of Very Vanilla cardstock & Die Cut using the Artisan Punch
Punch out two more labels in Night of Navy cardstock. Cut one in half on the Vertical, and cut the other in half on the horizontal. Using small amounts of Tombow MP Glue, adhere the corresponding pieces of the blue cardstock behind the Mr & Mrs tag to create a layered label. Apply Stampin Dimensionals to the reverse and adhere to the front of the card.
Add a few Basic Rhinestones and a Touch of Sparkle and the card is finished (once you have added an insert of course) Stamp a few Love hearts in the Navy ink, and adhere to the card using Stampin Dimensionals.
If you would like to ask any questions on techniques or products, or anything else related to my blog posts, please feel free to ask away.
Happy Stamping
Kim xxx
Contact me to order:
Telephone/Txt: 07759587004
Email: stampinupatthewarren@hotmail.co.uk
Or Order Online 24/7
Or Click on the image of the products used below and it will take you straight to my online store
Table built using Product Table Builder by The Crafty Owl - Independent Stampin' Up! Demonstrator.


No comments:
Post a Comment