
Good Evening all. Yes, I know I am really late in the day getting this out, but I have a very good reason why .... and that would be, having no sleep last night and feeling like death warmed up. I made a silly error in not getting my repeat prescription in on time, and one of my essential medicines was completely out. Unfortunately, it is a drug that messes with the way my brain works, and should never be stopped suddenly ... so Iwas unable to sleep, felt sick, had a pounding head and couldn't think straight! hhhmmm nice huh?? But not one to dwell on things, I did manage to sit in the workshop and make some half decent cards and boxes,
My medication has arrived, and I just hope I don't fall asleep whilst writing this he he.
So this weeks Stamp Set Showcase is
WALK IN THE WILD
I picked this as it is such a fab stamp set, and so versatile, so it was really easy to make some seasonal cards as well as all occasion cards.
We will be starting with a quick trio through masking technique.

Trim a piece of Whisper White cardstock to 12.5cms x 12.5cms
Now for the masking
Masking is a technique that allows you to create a void so you can stamp (as here) a background ... so that you can then stamp the foreground image in creating a faux 3D effect. The technique can be built in layers to create complex masked images, or just one mask, as is the case here.
The easiest way of creating a mask is to use post-it notes. Stamp your foreground image (the moose) ensuring when you stampthe moose onto the post-it note, that you stamp so at least part of the stamp is where the adhesive it on the PIN,
Cut around the stamp using paper snips, and then place the mask where you want to the void to be on your card.
Ink up the LOVELY AS A TREE stamp and using Basic Gray ink, stamp into the upper third of the trimmed cardstock, Stampin over the top of the post it note as you do,
Remove the PIN.
Now you can stamp your moose into the void using Soft Suede ink. The easiest method to do this is using a Stamp-A-Majig, but you can do it by eye although this won't be as accurate.

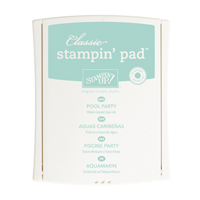
Sponge the sky with a mixture of Pool Party and Soft Sky ink, inking the edges of the card as you go, This should create the appearance of fog
Now sponge the bottom half of the card using Old Olive ink,
You now need to trim your layers as follows
Layer 1 - Mossy Meadow cardstock trimmed to 14cms x 13cms
Layer 2 - Soft Sky cardstock trimmed to
Layer 3 - Trim a piece of whisper white cardstock to 14cms x 14cms
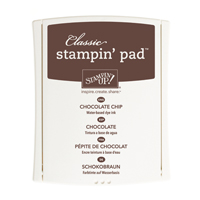
Stamp the THINKING Of YOU stamp in Chocolate Chip ink to the bottom right corner.

Layer up the cardstock using a little Tombow MP Glue, and going from the largest layer to the smallest (3 layers in total (excluding the card blank)
Apply Stampin Dimensionals tot he reverse of the largest panel.
Wrap around s piece of LostLagoon ribbon and tie a bow
Add some Soft Suede Candy Dots tot he bottom left of the card, and an Antique Brad to the top right.
Stick the topper to the 6" square card blank.
If you would like
to ask any questions on techniques or products, or anything else related to my
blog posts, please feel free to ask away
Happy Stamping
Kim xxx
Contact me to
order:
Telephone/Txt:
07759587004
Email: kim@stampinupatthewarren.com
Or Order
Online 24/7
Or Click on the
image of the products used below and it will take you straight to my online
store
 |  |  |  |  |
 |  |  |  |  |
 |  |  |  |  |
 |  |  |  |  |


No comments:
Post a Comment