
wow .... what a week!! Tutoring today and busy making new doorstops ready for our Guild of Essex Craftsmen Craft Fair this coming Bank Holiday weekend
AND my ebay store is getting sooo busy that I don't know if I am coming or going right now ... not that this is a bad thing ... I prefer to be busy since I am a life long work - a - holic
and who needs sleep anyway?
But time is running away from me
and it is
Half way through the week and that means another 3 days of Yippee Skippee he he
Todays make is more in touch with my Vintage Self in the shape of marrying
Yippee Skippee with Tea Party

You will need an A6 Whisper White Card Blank
Next trim a piece of Night of Navy cardstock to 12cms x 8.5 cms
Now trim a piece of Whisper White cardstock to 11.5cms x 8cms

Now to get rubber stamping with your Tea Party stamp set
Begin by stamping the border stamp around all four edges using Marina Mist ink
If you line up right, you should get 2 stamps along each long side, and one on each short side
Then randomly stamp inside the borders using the Coffee Pot stamp using Pool Party ink.
Sponge all the edges of the cardstock in Marina Mist ink, with a finger dauber and allow the colour to blend onto the main image too for a vintage feel.
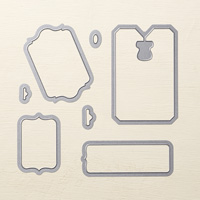
Next you need to stamp your 'Never Too Much Happy stamp onto whisper White cardstock using marina Mist ink. Die cut the sentiment using the Chalk Talk Framelits Die, sponge the edges.
Then die cut a larger tag from the Chalk Talk Framelits Collection in Night of Navy cardstock. Mount the sentiment onto the the dark blue Tag using Stampin Dimensionals
Then stamp the Coffee Pot/Flowers onto Whisper White cardstock, Die cut from the same Framelits and ink the edges of the cardstock

Now the construction
Mount the Bordered cardstock onto the Night of Navy cardstock using Tombow MP Glue
Tie some Blue ribbon around the layered card
Top this with the Teapot topper and the Sentiment Topper onto the cardstock with Stampin Dimensionals
Now get out your Night of Navy Blendabilities Alcohol Pens and paint a few Basic Pearls with the darkest of the Pens in the pack and add the pearls to your card
I love that you can colour pearl and rhinestone embellishments with Blendabilities. I haven't tried it on the vintage buttons but see no reason why it wouldn't work. Maybe I should give it a go?
And that is me for another day
Happy Stamping
Kim xxx
Contact me by:
 |  |  |  |  |
 |  |  |  |  |
 |  |  |  |  |
 |  |  |
Table built using Product Table Builder by The Crafty Owl - Independent Stampin' Up! Demonstrator.
Telephone/Text: 07759587004
Email: stampinupatthewarren@hotmail.co.uk
Except to remind you that you can order Stampin Up products 24/7
by clicking the photo's of the products used in todays tutorial below


No comments:
Post a Comment