
Good Morning Ladies and Gentleman
Welcome to The start of a new weeks Stamp Set Challenge
This week I will be sharing with you projects using
Oh My Goodies Stamp Set
As someone who loves to make handmade goodies as gifts for my family and friends this stamp set really stood out for me. But I also loved the stamp used for todays card, which states simply:
LIVE WELL
LAUGH HARD
LOVE BIG
Well I just had to have it, so the stamp set was top of my list when the new catalogue came out.
I coupled this with another of my favourite new additions to the Stampin Up Annual Catalogue
I LOVE LACE
I adore this background stamp. If you use first and second generation stamping, you can easily create a distressed look to your project.
The Embellishments are from a past seasonal catalogue, but I loved the pack so much I ordered a load when they were discontinued but put into the Clearance Rack. My point being ... keep an eye on that clearance rack (click on the Weekly Deals link towards the bottom of todays post. as you might just bag yourself a bargain!

Begin by Triming 3 pieces of Blackberry Bliss cardstock to:
14.5cms x 14.5cms
7.5cms x 7.5cms
4cms x 4cms
Now trim 3 pieces of Whisper White Cardstock to:
14cms x 14cms
7cms x 7cms
3.5cms x 3.5cms
So the first step is to stamp the background onto the trimmed Whisper White cardstock.
So stamp each piece with the I Love Lace background stamp. If it doesn't quite line up, just overstamp the blemishes and no-one will ever know he he
Once dry, mount these onto their corresponding pieces of Blackberry Bliss cardstock.
Apply Stampin Dimensionals to the reverse side of the medium and small layered backgrounds

Add some Venetian Crochet Trim lace to the lower third of the largest layered background square.
Mount the Medium square to the lower left of the largest square, and mount the smallest square in at the top right of the largest square (see the photo's)
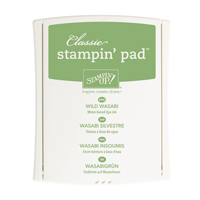
Stamp the sentiment using Wild Wasbi ink onto Whisper White cardstock. Die cut the sentiment using the Deco Labels Collection Die (smallest Die)
Die Cut the next size up Deco Label Die from Blushing Bride cardstock.
Next dry emboss the Blushing Bride label using Lovely Lace Textured Impressions Embossing Folder (TIEF). Mount the sentiment onto this with Stampin Dimensionals.

Now get out your Heart Punch and punch out a couple of times on Blushing Bride cardstock.
Randomly mount these on your card topper using Mini Glue Dots.
Add your embellishments & some Basic Rhinestones
Now the fun bit ... get out your Rich Razzleberry Blendabilities pen set, and use a combination of the 3 pens (brush end) and colour your rhinestones. I didn't believe this technique would work until I tried it ... and it does work.

Finally mount the topper onto your 15cms x 15cms white card blank4
And you are done!
Happy Stamping
Kim xxx


Before you go ... through August, by a Big Shot and you could qualify for a free stamp set. Visit my website for more details, (links below) and watch this video to see what you are missing
Contact us for details of our bespoke Handmade Greetings Cards, Wedding Stationary, Gift Boxes and Favours:
Phone: 08432896848
Text: 07759587004
Or Order your Stampin Up Products online 24/7 at


No comments:
Post a Comment