
Day two of this weeks Stamp Set Showcase
Oh My Goodies
And again, I have coupled it with the I Love Lace background stamp, but using different colours to yesterdays creation. I have also been playing with my Chevron Border Punch and the result can be seen below.
You will like to know that you will be playing with Blendabilities today too ...

To begin, you need to make your card blank by trimming a piece of A4 Whisper White cardstock to 30cms x 15cms and score the long side at 14cms. Fold and burnish with a bone folder.
Stamp the I Love Lace background stamp straight onto the front of the card blank. Use second generation stamping to cover any areas you missed and it will give a more authentic lace effect. Distress the edges of the card blank using a sponge and Always Artichoke ink.
Now trim a piece of Whisper White cardstock to 6.5cms x 14cms.
Randomly stamp this panel using black Memento ink and the Forever Florals stamp set.
Now you need to get creative with your Blendability Alcohol pens. I always start with the lightest colour and blend in the darker shades in the pack for the best result. Allow the panel to dry (it is normal for the ink to bleed through to the reverse side of the cardstock).
Once dry, mount this panel onto a piece of Wild Wasabi cardstock to 7cms x 14.5cms
Adhere a Tea Lace Doily to the reverse using a little Tombow Multipurpose Glue.
Adhere to the left hand side of the card blank using Tombow MP Glue.

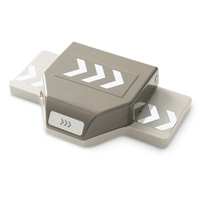
Now to play with the Chevron Punch. When you get your punch you will see two fine black lines on the the top of the punch to help you line up the punch. Use a permanent marker to mark the front of the punch with a black dot or line. You will also see that there are silver chevrons on the punch base to help you. Here I have offset the marks on the base creating thicker and thinner chevrons. Play around with it and have a bit of fun experimenting. I have interlocked two punched strips of Crumb Cake cardstock 15cms x 3cms. I used a tiny dot of Tombow MP glue to secure the strip to the bottom third of the card topper.

Now for the Sentiment.
Stamp the THANKS stamp using Chocolate Chip ink onto Whisper White cardstock.
Die cut the label and then Die another tag from Wild Wasabi cardstock using the
Apply Stampin Dimensionals to the reverse side if the mounted tag. next size up Die.

Tie a bow using some 1/8" taffetal Wild Wasabi ribbon and apply to the card base using Glue Dots
Add a few Basic Rhinestones and you are finished
Happy Stamping
Kim xxx
 |  |  |  |  |
 |  |  |  |  |
 |  |  |  |  |
 |  |  |  |  |
 |  |
Table built using Product Table Builder by The Crafty Owl - Independent Stampin' Up! Demonstrator.
Happy Stampin
Kim xxx
Before you go ... through August, by a Big Shot and you could qualify for a free stamp set. Visit my website for more details, (links below) and watch this video to see what you are missing
Contact us for details of our bespoke Handmade Greetings Cards, Wedding Stationary, Gift Boxes and Favours:
Phone: 08432896848
Text: 07759587004
Or Order your Stampin Up Products online 24/7 at


No comments:
Post a Comment