
Here we are on the penultimate day of this weeks stamp set showcase
WETLANDS
Well today, I have had to write this post back to front. I normally insert the photo's and write the text around it. But not today, I finally got my ebay store up and running (Fabrics in the main) and it has ended up taking up a lot of time. I managed to get a little time to myself and made today's card and tomorrows, and even had a little time to play with my Chevron Punch (see tomorrows post).
Then my next appointment arrived, a chippie who is going to be making Heavenly Hutches caskets for pet burials (small animals) and since I breed small animals and have card craft and fabric craft skills, he has asked me to do the liners for the caskets - for a fee of course!
Then I ran out of time to do the photography as it was TOO dark by 9 pm and there were shadows everywhere, so photography will be inserted early in the morning so no-one sees a blogpost missing it's photos he he

So today is a day for Brayering, and I have gone for a dusk scene with the moon present in the sky.
Brayering is one of those techniques that I don't use often enough, but today has got me all fired up to try it more often as I really enjoyed getting out my Splodge Mat and inking up my brayer.
I began by trimming a piece of whisper white cardstock to 12cms x 12cms
Then get some printer paper, place it over the cut piece of cardstock and use a pencil to draw a line around where the cardstock is to help you line up your masks to be sure they fit in place nicely
Draw a rough hill (to be a sand dune later), then repeat with another piece of printer paper and draw another curve to overlap the first. DO NOT CUT ThEM OUT
For the best final effect, you need to carefully tear the curved edges you have drawn.
Now to ink up your brayer ... place your first mask on the card (so the uncovered section is at the bottom of the cardstock), then load up your brayer with Sahara Sand ink and start brayering off the cardstock onto your grid paper or scrap paper and gradually ink over the cardstock. Keep going over it to try and get a smooth looking finish,
Remove your first mask and place your second mask on the cardstock (again with the unmasked area at the bottom of the cardstock) and this time use Crumb Cake to ink up the brayer and apply to the cardstock as before.

Use a 1" circle punch to cut out a circle of paper from printer paper. Now for the sky. Out the circle of paper where you want your moon to be on the cardstock, and start from the top, working down towards your dunes, brayer using Soft Sky.
Finally (for the brayering anyway, remove all masks and ink up the brayer with Sahara Sand ink again, and brayer over the whole piece of cardstock to give that dusk hazey look.
Now clean your brayer and get our the stamp set.
Using Night of Navy ink, stamp the large goose stamp on your brayered cardstock.
Overstamp the background randomly using first and second generation stamping with Basic Gray ink and the Grass stamp.
Trim a piece of Night of Navy cardstock to 12.5cms x 12.5cms
Adhere the brayered cardstock to cardstock onto the night of navy cardstock. Apply Stampin Dimensionals to the reverse and mount onto a 15cms x 15cms Whisper White cardstock.

Select your sentiment stamp of choice from the WETLANDS stamp set and stamp onto a scrap of Whisper White cardstock using Night of Navy ink.
Die cut the sentiment using the Project Life card & label die set.
Die cut two more labels in Night of Navy cardstock to mat your sentiment.
The first Navy label needs to be cut in half vertically and the second cut in half horizontally.
Use your Tombow multipurpose glue (don't be heavy handed( to stick the corresponding pieces onto the back of your sentiment label.
See yesterdays post on how to do the faux marbled effect on the sentiment label
Apply the sentiment to the bottom of the card using a combination of Glue Dots and Stampin Dimensionals (to allow for the different heights of the card elements. Add a couple of basic Rhinestones and the job is done!
Well done, pat yourself on the back if this is your first attempt at brayering. Remember ... practice makes perfect.
Have fun
Kim xxx
 |  |  |  |  |
 |  |  |  |  |
 | 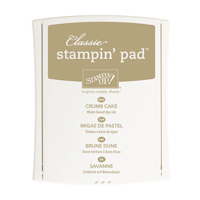 |  |  |  |
Table built using Product Table Builder by The Crafty Owl - Independent Stampin' Up! Demonstrator.
Check out the Big Shot bundle on my website (click the links below) for details of big savings on Big Shot Bundles .... but once they are gone, they are gone lol
Get your Christmas Pressie Early ... You know you want to ... I would never be without mine!
Contact us for further information on our Handmade Greetings Cards, Wedding Stationary and Gift Packaging Service
Telephone: 08432896848
Text@ 07759587004
Or Shop Online for all your papercraft supplies 24/7


No comments:
Post a Comment