
Here we are again, the end of another week of Stamp Set Showcases!
I swear that the older you get, the faster time goes by. Am I the only one who feels this I wonder?
Another month and I will be starting the Christmas Creations Countdown!
But for now I can relax and enjoy making Occasion cards, Boxes, Favours etc
Anyway, today's Oh My Goodies creation uses a fab technique that anyone can do ... if you have had a go at rubber stamping, then you can easily make this.
It would be great as a WOW hostess make and take or a male or female greetings card
This technique was featured in last years Annual Catalogue and I have used it again and again ... if you haven't tried this .... well you just must!!!

Begin by making your card blank by trimming a piece of Whisper White cardstock to 30cms x 15cms. Score the long side at 15cms, fold and burnish the fold with a bone folder.
Put to one side.

Now trim a piece of Whisper White cardstock to 12cms x 12cms
Get 3 ink Classic pads
I have used So Saffron, Marina Mist & Wild Wasabi
Open the ink pads, and you want to drag the inked side of the ink pad randomly across the 12cms x 12cms piece of Whisper White cardstock, overlapping them as you go (but let each colour dry before using the next ink pad to prevent transfer of inks to the ink pads) Make sure you leave some white areas too.
Now get your World Map stamp and stamp over the background you have created using Black Stazon ink.
Ink the edges of the cardstock using Marina mist ink.
Once dry, mount the panel centrally on your card blank. Ink

Stamp the sentiment of your choice from the Oh My Goodies stamp set, using black Stazon ink onto
Die cut the sentiment label using the Deco Labels Collection Die. Die Cut a dark blue label, the next size up from the one you used to die cut the sentiment. (I used Night of Navy).
Whisper White cardstock, Ink the edges of the sentiment cardstock.
Stick the sentiment label to the dark blue label. Fix Stampin Dimensionals to the back of the blue label.
Attach to the bottom left of your card.

Finally use some green Candy Dots (subtles collection) to the top Left and bottom right of the card - Remember the rule odd numbers - always add 1, 3, or 5 - even numbers of embellishments just look wrong and unbalanced.
If you are interested in this, look up The Golden Rule - a technique you can also apply to your card making
Happy Stamping
Kim xxx
 |  |  |  |  |
 |  |  |  |  |
 |  |  |  |  |
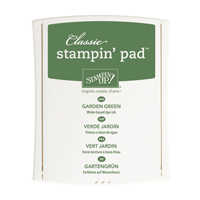 |  | 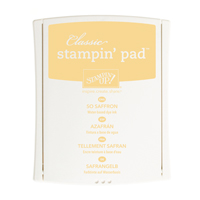 |  | 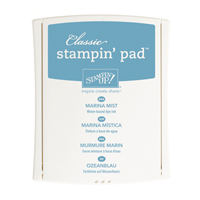 |
Table built using Product Table Builder by The Crafty Owl - Independent Stampin' Up! Demonstrator.
Happy Stamping
Kim xxx
Before you go ... through August, by a Big Shot and you could qualify for a free stamp set. Visit my website for more details, (links below) and watch this video to see what you are missing
Before you go ... through August, by a Big Shot and you could qualify for a free stamp set. Visit my website for more details, (links below) and watch this video to see what you are missing
Contact us for details of our bespoke Handmade Greetings Cards, Wedding Stationary, Gift Boxes and Favours:
Email: stampinupatthewarren@hotmail.co.uk
Phone: 08432896848
Text: 07759587004
Or Order your Stampin Up Products online 24/7 at
http://www.stampinupatthewarren.stampinup.net


No comments:
Post a Comment